3. OPNFV Fuel User Guide
3.1. Abstract
This document contains details about using OPNFV Fuel Iruya release after
it was deployed. For details on how to deploy OpenStack, check
the installation instructions in the References section.
This is an unified documentation for both x86_64 and aarch64
architectures. All information is common for both architectures
except when explicitly stated.
3.2. Network Overview
Fuel uses several networks to deploy and administer the cloud:
Network name |
Description |
|---|---|
PXE/admin |
Used for booting the nodes via PXE and/or Salt control network |
mcpcontrol |
Docker network used to provision the infrastructure hosts (Salt & MaaS) |
management |
Used for internal communication between OpenStack components |
internal |
Used for VM data communication within the cloud deployment |
public |
Used to provide Virtual IPs for public endpoints that are used to connect to OpenStack services APIs. Used by Virtual machines to access the Internet |
These networks - except mcpcontrol - can be Linux bridges configured
before the deploy on the Jumpserver.
If they don’t exists at deploy time, they will be created by the scripts as
libvirt managed networks (except mcpcontrol, which will be handled by
Docker using the bridge driver).
3.2.1. Network mcpcontrol
mcpcontrol is a virtual network, managed by Docker. Its only purpose is to
provide a simple method of assigning an arbitrary INSTALLER_IP to the Salt
master node (cfg01), to maintain backwards compatibility with old OPNFV
Fuel behavior. Normally, end-users only need to change the INSTALLER_IP if
the default CIDR (10.20.0.0/24) overlaps with existing lab networks.
mcpcontrol uses the Docker bridge driver, so the Salt master (cfg01)
and the MaaS containers (mas01, when present) get assigned predefined IPs
(.2, .3, while the jumpserver gets .1).
Host |
Offset in IP range |
Default address |
|---|---|---|
|
1st |
|
|
2nd |
|
|
3rd |
|
This network is limited to the jumpserver host and does not require any
manual setup.
3.2.2. Network PXE/admin
Tip
PXE/admin does not usually use an IP range offset in IDF.
Note
During MaaS commissioning phase, IP addresses are handed out by
MaaS’s DHCP.
Warning
Default addresses in below table correspond to a PXE/admin CIDR of
192.168.11.0/24 (the usual value used in OPNFV labs).
This is defined in IDF and can easily be changed to something else.
Host |
Offset in IP range |
Default address |
|---|---|---|
|
1st |
|
|
2nd |
|
|
3rd |
|
|
4th, 5th |
|
|
… |
|
|
||
|
||
|
||
|
||
|
||
|
||
|
||
|
3.2.3. Network management
Tip
management often has an IP range offset defined in IDF.
Warning
Default addresses in below table correspond to a management IP range of
172.16.10.10-172.16.10.254 (one of the commonly used values in OPNFV
labs). This is defined in IDF and can easily be changed to something
else. Since the jumpserver address is manually assigned, this is
usually not subject to the IP range restriction in IDF.
Host |
Offset in IP range |
Default address |
|---|---|---|
|
N/A |
|
|
1st |
|
|
2nd |
|
|
3rd, 4th, 5th |
|
|
… |
|
|
||
|
||
|
||
|
||
|
||
|
||
|
||
|
3.2.4. Network internal
Tip
internal does not usually use an IP range offset in IDF.
Warning
Default addresses in below table correspond to an internal CIDR of
10.1.0.0/24 (the usual value used in OPNFV labs).
This is defined in IDF and can easily be changed to something else.
Host |
Offset in IP range |
Default address |
|---|---|---|
|
N/A |
|
|
1st, 2nd, 3rd |
|
|
4th, 5th, … |
|
3.2.5. Network public
Tip
public often has an IP range offset defined in IDF.
Warning
Default addresses in below table correspond to a public IP range of
172.30.10.100-172.30.10.254 (one of the used values in OPNFV
labs). This is defined in IDF and can easily be changed to something
else. Since the jumpserver address is manually assigned, this is
usually not subject to the IP range restriction in IDF.
Host |
Offset in IP range |
Default address |
|---|---|---|
|
N/A |
|
|
1st, 2nd, 3rd |
|
|
4th, 5th, 6th |
|
|
… |
|
|
||
|
3.3. Accessing the Salt Master Node (cfg01)
The Salt Master node (cfg01) runs a sshd server listening on
0.0.0.0:22.
To login as ubuntu user, use the RSA private key /var/lib/opnfv/mcp.rsa:
jenkins@jumpserver:~$ ssh -o StrictHostKeyChecking=no \
                          -i /var/lib/opnfv/mcp.rsa \
                          -l ubuntu 10.20.0.2
ubuntu@cfg01:~$
Note
User ubuntu has sudo rights.
Tip
The Salt master IP (10.20.0.2) is not hard set, it is configurable via
INSTALLER_IP during deployment.
Tip
Starting with the Gambia release, cfg01 is containerized, so this
also works (from jumpserver only):
jenkins@jumpserver:~$ docker exec -it fuel bash
root@cfg01:~$
3.4. Accessing the MaaS Node (mas01)
Starting with the Hunter release, the MaaS node (mas01) is
containerized and no longer runs a sshd server. To access it (from
jumpserver only):
jenkins@jumpserver:~$ docker exec -it maas bash
root@mas01:~$
3.5. Accessing Cluster Nodes
Logging in to cluster nodes is possible from the Jumpserver, Salt Master etc.
jenkins@jumpserver:~$ ssh -i /var/lib/opnfv/mcp.rsa ubuntu@192.168.11.52
Tip
/etc/hosts on cfg01 has all the cluster hostnames, which can be
used instead of IP addresses.
/root/.ssh/config on cfg01 configures the default user and key:
ubuntu, respectively /root/fuel/mcp/scripts/mcp.rsa.
root@cfg01:~$ ssh ctl01
3.6. Debugging MaaS Comissioning/Deployment Issues
One of the most common issues when setting up a new POD is MaaS failing to
commission/deploy the nodes, usually timing out after a couple of retries.
Such failures might indicate misconfiguration in PDF/IDF, TOR
switch configuration or even faulty hardware.
Here are a couple of pointers for isolating the problem.
3.6.1. Accessing the MaaS Dashboard
MaaS web-based dashboard is available at
http://<jumpserver IP address>:5240/MAAS.
The administrator credentials are opnfv/opnfv_secret.
3.6.2. Ensure Commission/Deploy Timeouts Are Not Too Small
Some hardware takes longer to boot or to run the initial scripts during
commissioning/deployment phases. If that’s the case, MaaS will time out
waiting for the process to finish. MaaS logs will reflect that, and the
issue is usually easy to observe on the nodes’ serial console - if the node
seems to PXE-boot the OS live image, starts executing cloud-init/curtin
hooks without spilling critical errors, then it is powered down/shut off,
most likely the timeout was hit.
To access the serial console of a node, see your board manufacturer’s documentation. Some hardware no longer has a physical serial connector these days, usually being replaced by a vendor-specific software-based interface.
If the board supports SOL (Serial Over LAN) over IPMI lanplus protocol,
a simpler solution to hook to the serial console is to use ipmitool.
Tip
Early boot stage output might not be shown over SOL, but only over
the video console provided by the (vendor-specific) interface.
jenkins@jumpserver:~$ ipmitool -H <host BMC IP> -U <user> -P <pass> \
                               -I lanplus sol activate
To bypass this, simply set a larger timeout in the IDF.
3.6.3. Check Jumpserver Network Configuration
jenkins@jumpserver:~$ brctl show
jenkins@jumpserver:~$ ifconfig -a
Configuration item |
Expected behavior |
|---|---|
IP addresses assigned to bridge ports |
IP addresses should be assigned to the bridge, and not to individual bridge ports |
3.6.4. Check Network Connectivity Between Nodes on the Jumpserver
cfg01 is a Docker container running on the jumpserver, connected to
Docker networks (created by docker-compose automatically on container up),
which in turn are connected using veth pairs to their libvirt managed
counterparts (or manually created bridges).
For example, the mgmt network(s) should look like below for a virtual
deployment.
jenkins@jumpserver:~$ brctl show mgmt
bridge name   bridge id           STP enabled   interfaces
mgmt          8000.525400064f77   yes           mgmt-nic
                                                veth_mcp2
                                                vnet8

jenkins@jumpserver:~$ docker network ls
NETWORK ID    NAME                              DRIVER   SCOPE
81a0fdb3bd78  docker-compose_mgmt               macvlan  local
[...]

jenkins@jumpserver:~$ docker network inspect docker-compose_mgmt
[
    {
        "Name": "docker-compose_mgmt",
        [...]
        "Options": {
            "parent": "veth_mcp3"
        },
    }
]
Before investigating the rest of the cluster networking configuration, the
first thing to check is that cfg01 has network connectivity to other
jumpserver hosted nodes, e.g. mas01 and to the jumpserver itself
(provided that the jumpserver has an IP address in that particular network
segment).
jenkins@jumpserver:~$ docker exec -it fuel bash
root@cfg01:~# ifconfig -a | grep inet
    inet addr:10.20.0.2     Bcast:0.0.0.0  Mask:255.255.255.0
    inet addr:172.16.10.2   Bcast:0.0.0.0  Mask:255.255.255.0
    inet addr:192.168.11.2  Bcast:0.0.0.0  Mask:255.255.255.0
For each network of interest (mgmt, PXE/admin), check
that cfg01 can ping the jumpserver IP in that network segment.
Note
mcpcontrol is set up at container bringup, so it should always be
available, while the other networks are configured by Salt as part of the
virtual_init STATE file.
root@cfg01:~# ping -c1 10.20.0.1  # mcpcontrol jumpserver IP
root@cfg01:~# ping -c1 10.20.0.3  # mcpcontrol mas01 IP
Tip
mcpcontrol CIDR is configurable via INSTALLER_IP env var during
deployment. However, IP offsets inside that segment are hard set to .1
for the jumpserver, .2 for cfg01, respectively to .3 for
mas01 node.
root@cfg01:~# salt 'mas*' pillar.item --out yaml \
              _param:infra_maas_node01_deploy_address \
              _param:infra_maas_node01_address
mas01.mcp-ovs-noha.local:
  _param:infra_maas_node01_address: 172.16.10.12
  _param:infra_maas_node01_deploy_address: 192.168.11.3

root@cfg01:~# ping -c1 192.168.11.1  # PXE/admin jumpserver IP
root@cfg01:~# ping -c1 192.168.11.3  # PXE/admin mas01 IP
root@cfg01:~# ping -c1 172.16.10.1   # mgmt jumpserver IP
root@cfg01:~# ping -c1 172.16.10.12  # mgmt mas01 IP
Tip
Jumpserver IP addresses for PXE/admin, mgmt and public bridges
are user-chosen and manually set, so above snippets should be adjusted
accordingly if the user chose a different IP, other than .1 in each
CIDR.
Alternatively, a quick nmap scan would work just as well.
root@cfg01:~# apt update && apt install -y nmap
root@cfg01:~# nmap -sn 10.20.0.0/24     # expected: cfg01, mas01, jumpserver
root@cfg01:~# nmap -sn 192.168.11.0/24  # expected: cfg01, mas01, jumpserver
root@cfg01:~# nmap -sn 172.16.10.0/24   # expected: cfg01, mas01, jumpserver
3.6.5. Check DHCP Reaches Cluster Nodes
One common symptom observed during failed commissioning is that DHCP does
not work as expected between cluster nodes (baremetal nodes in the cluster; or
virtual machines on the jumpserver in case of hybrid deployments) and
the MaaS node.
To confirm or rule out this possibility, monitor the serial console output of
one (or more) cluster nodes during MaaS commissioning. If the node is
properly configured to attempt PXE boot, yet it times out waiting for an IP
address from mas01 DHCP, it’s worth checking that DHCP packets
reach the jumpserver, respectively the mas01 container.
jenkins@jumpserver:~$ sudo apt update && sudo apt install -y dhcpdump
jenkins@jumpserver:~$ sudo dhcpdump -i admin_br
Tip
If DHCP requests are present, but no replies are sent, iptables
might be interfering on the jumpserver.
3.6.6. Check MaaS Logs
If networking looks fine, yet nodes still fail to commission and/or deploy,
MaaS logs might offer more details about the failure:
/var/log/maas/maas.log/var/log/maas/rackd.log/var/log/maas/regiond.log
Tip
If the problem is with the cluster node and not on the MaaS server,
node’s kernel logs usually contain useful information.
These are saved via rsyslog on the mas01 node in
/var/log/maas/rsyslog.
3.7. Recovering Failed Deployments
The first deploy attempt might fail due to various reasons. If the problem
is not systemic (i.e. fixing it will not introduce incompatible configuration
changes, like setting a different INSTALLER_IP), the environment is safe
to be reused and the deployment process can pick up from where it left off.
Leveraging these mechanisms requires a minimum understanding of how the
deploy process works, at least for manual STATE runs.
3.7.1. Automatic (re)deploy
OPNFV Fuel’s deploy.sh script offers a dedicated argument for this, -f,
which will skip executing the first N STATE files, where N is the
number of -f occurrences in the argument list.
Tip
The list of STATE files to be executed for a specific environment
depends on the OPNFV scenario chosen, deployment type (virtual,
baremetal or hybrid) and the presence/absence of a VCP
(virtualized control plane).
e.g.: Let’s consider a baremetal enviroment, with VCP and a simple
scenario os-nosdn-nofeature-ha, where deploy.sh failed executing the
openstack_ha STATE file.
The simplest redeploy approach (which usually works for any combination of
deployment type/VCP/scenario) is to issue the same deploy command as the
original attempt used, then adding a single -f:
jenkins@jumpserver:~/fuel$ ci/deploy.sh -l <lab_name> -p <pod_name> \
                                        -s <scenario> [...] \
                                        -f # skips running the virtual_init STATE file
All STATE files are re-entrant, so the above is equivalent (but a little
slower) to skipping all STATE files before the openstack_ha one, like:
jenkins@jumpserver:~/fuel$ ci/deploy.sh -l <lab_name> -p <pod_name> \
                                        -s <scenario> [...] \
                                        -ffff # skips virtual_init, maas, baremetal_init, virtual_control_plane
Tip
For fine tuning the infrastructure setup steps executed during deployment,
see also the -e and -P deploy arguments.
Note
On rare occassions, the cluster cannot idempotently be redeployed (e.g.
broken MySQL/Galera cluster), in which case some cleanup is due before
(re)running the STATE files. See -E deploy arg, which allows
either forcing a MaaS node deletion, then redeployment of all
baremetal nodes, if used twice (-EE); or only erasing the VCP VMs
if used only once (-E).
3.7.2. Manual STATE Run
Instead of leveraging the full deploy.sh, one could execute the STATE
files one by one (or partially) from the cfg01.
However, this requires a better understanding of how the list of STATE
files to be executed is constructed for a specific scenario, depending on the
deployment type and the cluster having baremetal nodes, implemented in:
mcp/config/scenario/defaults.yaml.j2mcp/config/scenario/<scenario-name>.yaml
e.g.: For the example presented above (baremetal with VCP,
os-nosdn-nofeature-ha), the list of STATE files would be:
virtual_initmaasbaremetal_initvirtual_control_planeopenstack_hanetworks
To execute one (or more) of the remaining STATE files after a failure:
jenkins@jumpserver:~$ docker exec -it fuel bash
root@cfg01:~$ cd ~/fuel/mcp/config/states
root@cfg01:~/fuel/mcp/config/states$ ./openstack_ha
root@cfg01:~/fuel/mcp/config/states$ CI_DEBUG=true ./networks
For even finer granularity, one can also run the commands in a STATE file
one by one manually, e.g. if the execution failed applying the rabbitmq
sls:
root@cfg01:~$ salt -I 'rabbitmq:server' state.sls rabbitmq
3.8. Exploring the Cloud with Salt
To gather information about the cloud, the salt commands can be used. It is based around a master-minion idea where the salt-master pushes config to the minions to execute actions.
For example tell salt to execute a ping to 8.8.8.8 on all the nodes.
root@cfg01:~$ salt "*" network.ping 8.8.8.8
                   ^^^                       target
                       ^^^^^^^^^^^^          function to execute
                                    ^^^^^^^  argument passed to the function
Tip
Complex filters can be done to the target like compound queries or node roles.
For more information about Salt see the References section.
Some examples are listed below. Note that these commands are issued from Salt
master as root user.
3.8.1. View the IPs of All the Components
root@cfg01:~$ salt "*" network.ip_addrs
cfg01.mcp-odl-ha.local:
   - 10.20.0.2
   - 172.16.10.100
mas01.mcp-odl-ha.local:
   - 10.20.0.3
   - 172.16.10.3
   - 192.168.11.3
.........................
3.8.2. View the Interfaces of All the Components and Put the Output in a yaml File
root@cfg01:~$ salt "*" network.interfaces --out yaml --output-file interfaces.yaml
root@cfg01:~# cat interfaces.yaml
cfg01.mcp-odl-ha.local:
 enp1s0:
   hwaddr: 52:54:00:72:77:12
   inet:
   - address: 10.20.0.2
     broadcast: 10.20.0.255
     label: enp1s0
     netmask: 255.255.255.0
   inet6:
   - address: fe80::5054:ff:fe72:7712
     prefixlen: '64'
     scope: link
   up: true
.........................
3.8.3. View Installed Packages on MaaS Node
root@cfg01:~# salt "mas*" pkg.list_pkgs
mas01.mcp-odl-ha.local:
    ----------
    accountsservice:
        0.6.40-2ubuntu11.3
    acl:
        2.2.52-3
    acpid:
        1:2.0.26-1ubuntu2
    adduser:
        3.113+nmu3ubuntu4
    anerd:
        1
.........................
3.8.4. Execute Any Linux Command on All Nodes (e.g. ls /var/log)
root@cfg01:~# salt "*" cmd.run 'ls /var/log'
cfg01.mcp-odl-ha.local:
   alternatives.log
   apt
   auth.log
   boot.log
   btmp
   cloud-init-output.log
   cloud-init.log
.........................
3.8.5. Execute Any Linux Command on Nodes Using Compound Queries Filter
root@cfg01:~# salt -C '* and cfg01*' cmd.run 'ls /var/log'
cfg01.mcp-odl-ha.local:
   alternatives.log
   apt
   auth.log
   boot.log
   btmp
   cloud-init-output.log
   cloud-init.log
.........................
3.8.6. Execute Any Linux Command on Nodes Using Role Filter
root@cfg01:~# salt -I 'nova:compute' cmd.run 'ls /var/log'
cmp001.mcp-odl-ha.local:
   alternatives.log
   apache2
   apt
   auth.log
   btmp
   ceilometer
   cinder
   cloud-init-output.log
   cloud-init.log
.........................
3.9. Accessing Openstack
Once the deployment is complete, Openstack CLI is accessible from controller
VMs (ctl01 … ctl03).
Openstack credentials are at /root/keystonercv3.
root@ctl01:~# source keystonercv3
root@ctl01:~# openstack image list
+--------------------------------------+-----------------------------------------------+--------+
| ID                                   | Name                                          | Status |
+======================================+===============================================+========+
| 152930bf-5fd5-49c2-b3a1-cae14973f35f | CirrosImage                                   | active |
| 7b99a779-78e4-45f3-9905-64ae453e3dcb | Ubuntu16.04                                   | active |
+--------------------------------------+-----------------------------------------------+--------+
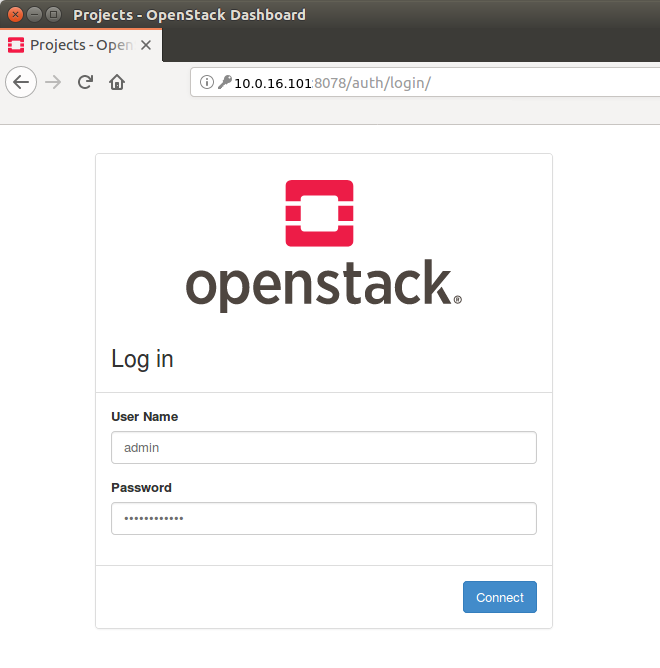
The OpenStack Dashboard, Horizon, is available at http://<proxy public VIP>.
The administrator credentials are admin/opnfv_secret.
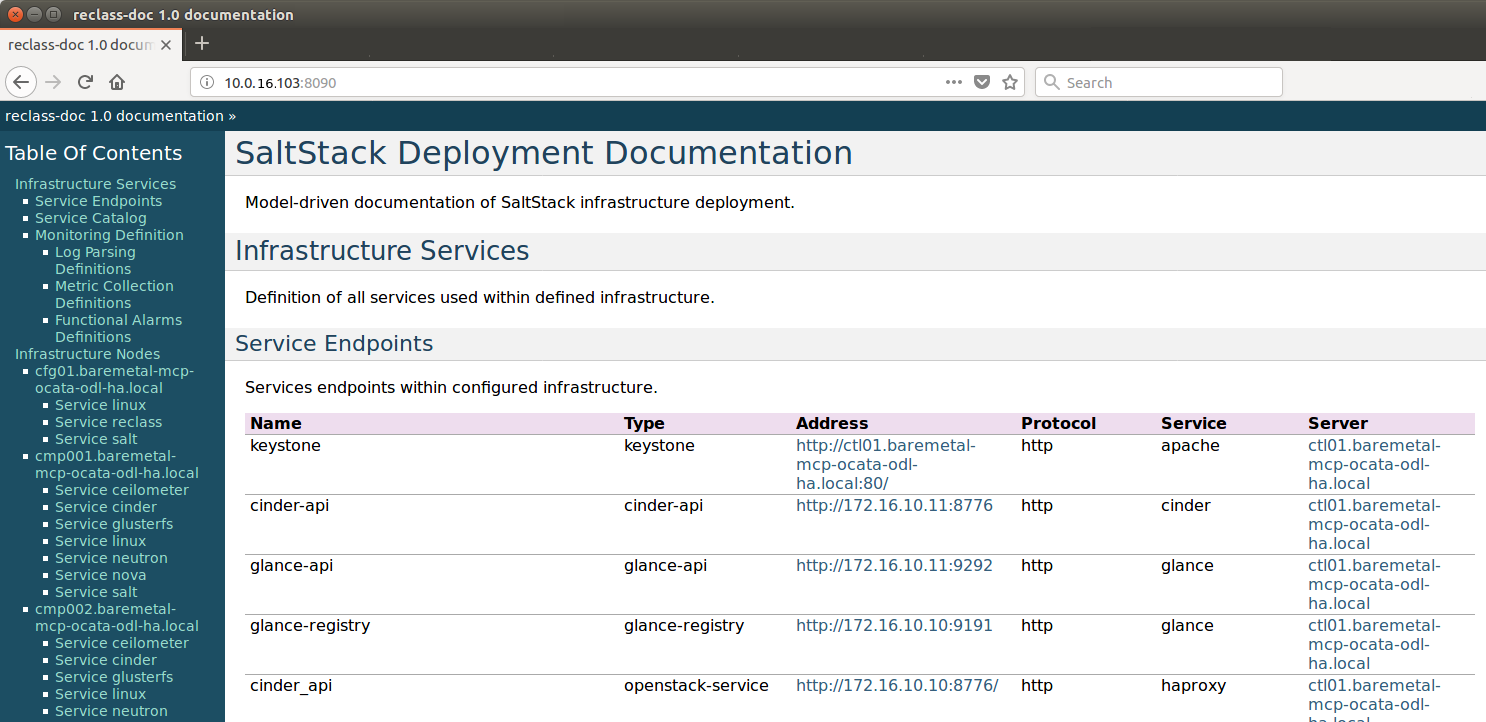
A full list of IPs/services is available at <proxy public VIP>:8090 for
baremetal deploys.
3.10. Guest Operating System Support
There are a number of possibilities regarding the guest operating systems
which can be spawned on the nodes.
The current system spawns virtual machines for VCP VMs on the KVM nodes and VMs
requested by users in OpenStack compute nodes. Currently the system supports
the following UEFI-images for the guests:
OS name |
|
|
|---|---|---|
Ubuntu 17.10 |
untested |
Full support |
Ubuntu 16.04 |
Full support |
Full support |
Ubuntu 14.04 |
untested |
Full support |
Fedora atomic 27 |
untested |
Full support |
Fedora cloud 27 |
untested |
Full support |
Debian |
untested |
Full support |
Centos 7 |
untested |
Not supported |
Cirros 0.3.5 |
Full support |
Full support |
Cirros 0.4.0 |
Full support |
Full support |
The above table covers only UEFI images and implies OVMF/AAVMF
firmware on the host. An x86_64 deployment also supports non-UEFI
images, however that choice is up to the underlying hardware and the
administrator to make.
The images for the above operating systems can be found in their respective websites.
3.11. OpenStack Storage
OpenStack Cinder is the project behind block storage in OpenStack and OPNFV Fuel supports LVM out of the box.
By default x86_64 supports 2 additional block storage devices, while
aarch64 supports only one.
More devices can be supported if the OS-image created has additional
properties allowing block storage devices to be spawned as SCSI drives.
To do this, add the properties below to the server:
root@ctl01:~$ openstack image set --property hw_disk_bus='scsi' \
                                  --property hw_scsi_model='virtio-scsi' \
                                  <image>
The choice regarding which bus to use for the storage drives is an important
one. virtio-blk is the default choice for OPNFV Fuel, which attaches the
drives in /dev/vdX. However, since we want to be able to attach a
larger number of volumes to the virtual machines, we recommend the switch to
SCSI drives which are attached in /dev/sdX instead.
virtio-scsi is a little worse in terms of performance but the ability to
add a larger number of drives combined with added features like ZFS, Ceph et
al, leads us to suggest the use of virtio-scsi in OPNFV Fuel for both
architectures.
More details regarding the differences and performance of virtio-blk vs
virtio-scsi are beyond the scope of this manual but can be easily found
in other sources online like VirtIO SCSI or VirtIO performance.
Additional configuration for configuring images in OpenStack can be found in the OpenStack Glance documentation.
3.12. OpenStack Endpoints
For each OpenStack service three endpoints are created: admin, internal
and public.
ubuntu@ctl01:~$ openstack endpoint list --service keystone
+----------------------------------+-----------+--------------+--------------+---------+-----------+------------------------------+
| ID                               | Region    | Service Name | Service Type | Enabled | Interface | URL                          |
+----------------------------------+-----------+--------------+--------------+---------+-----------+------------------------------+
| 008fec57922b4e9e8bf02c770039ae77 | RegionOne | keystone     | identity     | True    | internal  | http://172.16.10.26:5000/v3  |
| 1a1f3c3340484bda9ef7e193f50599e6 | RegionOne | keystone     | identity     | True    | admin     | http://172.16.10.26:35357/v3 |
| b0a47d42d0b6491b995d7e6230395de8 | RegionOne | keystone     | identity     | True    | public    | https://10.0.15.2:5000/v3    |
+----------------------------------+-----------+--------------+--------------+---------+-----------+------------------------------+
MCP sets up all Openstack services to talk to each other over unencrypted
connections on the internal management network. All admin/internal endpoints
use plain http, while the public endpoints are https connections terminated
via nginx at the VCP proxy VMs.
To access the public endpoints an SSL certificate has to be provided. For
convenience, the installation script will copy the required certificate
to the cfg01 node at /etc/ssl/certs/os_cacert.
Copy the certificate from the cfg01 node to the client that will access
the https endpoints and place it under /etc/ssl/certs/.
The SSL connection will be established automatically after.
jenkins@jumpserver:~$ ssh -o StrictHostKeyChecking=no -i /var/lib/opnfv/mcp.rsa -l ubuntu 10.20.0.2 \
  "cat /etc/ssl/certs/os_cacert" | sudo tee /etc/ssl/certs/os_cacert
3.13. Reclass Model Viewer Tutorial
In order to get a better understanding of the reclass model Fuel uses, the
reclass-doc tool can be used to visualise the reclass model.
To avoid installing packages on the jumpserver or another host, the
cfg01 Docker container can be used. Since the fuel git repository
located on the jumpserver is already mounted inside cfg01 container,
the results can be visualized using a web browser on the jumpserver at the
end of the procedure.
jenkins@jumpserver:~$ docker exec -it fuel bash
root@cfg01:~$ apt-get update
root@cfg01:~$ apt-get install -y npm nodejs
root@cfg01:~$ npm install -g reclass-doc
root@cfg01:~$ ln -s /usr/bin/nodejs /usr/bin/node
root@cfg01:~$ reclass-doc --output ~/fuel/mcp/reclass/modeler \
                                   ~/fuel/mcp/reclass
The generated documentation should be available on the jumpserver inside
fuel git repo subpath mcp/reclass/modeler/index.html.
